Configure Your Galaxy Instance as a Custos Client
On this page
This page explains how to configure this feature as an administrator, for user-specific docs, please refer to the Use page.
About Custos
Custos is an NSF-funded project, backed by open source software that provides science gateways such as Galaxy with single sign-on, group management, and management of secrets such as access keys and OAuth2 access tokens. With Galaxy, Custos allows users to login to Galaxy without having to (explicitly) create a Galaxy user account while being able to login choosing from more than 3,000 available Identity Providers (IdPs). Many of the academic institutions from around the world are supported allowing users to link their institutional identities with a Galaxy account.
Configure Galaxy to work with Custos
To set up a Galaxy instance to work with Custos, it is necessary to enable
OIDC-based login for Galaxy. To do this, follow the instructions for enabling
OIDC-based login.
Next, it is necessary to register your Galaxy instance as a client of Custos.
The following section demonstrates how to do that. Finally, you need to
configure Custos as an IdP provider in Galaxy by editing
config/oidc_backends_config.xml. An example file is provided below.
1. Register your Galaxy instance with Custos
Development of a portal for registering new Custos clients is currently in progress. In the meantime, you can register a client directly through a REST API. This can be accomplished using a platform such as Postman.
To register a new Galaxy client with Custos, make a POST request with the following body, replacing information with your relevant data:
-
URI : https://dev.custos.usecustos.org:/apiserver/tenant-management/v1.0.0/oauth2/tenant
-
Method : POST
-
Body :
client_name:John Doe University
requester_email:johndoe@university.edu
admin_username:johndoe
admin_first_name:John
admin_last_name:Doe
admin_email:johndoe@university.edu
contacts:[1234567890]
redirect_uris:[https://jduniversity.edu/galaxy/authnz/custos/callback]
domain:jduniversity.edu
admin_password:1234
client_uri:jduniversity.edu
scope:email profile openId org.cilogon.userinfo
application_type:web
For example:

-
The Domain should be the main address that users will use to get to your instance of Galaxy.
-
For the Redirect URIs field, you need to enter your instance’s OIDC redirect URI, which is in the following template:
<Host URI>/authnz/custos/callbackFor instance:
https://university.edu/galaxy/authnz/custos/callbackSee this section for details.
-
After making the POST request, you should get a response containing your
Client IDandClient Secret; note this info! You will need it for the Galaxy configuration.
-
Finally, to have your client activated, send an email to custos@airavata.apache.org with your
Client ID.
2. Configure Galaxy
Once we have an activated client ID and client secret from Custos, we need to
configure Galaxy. As a first step, make sure to enable OIDC
login. After setting up
config/oidc_config.xml, which is common to multiple IdPs, you need to
configure config/oidc_backends_config.xml. The following is an example of a
configuration. Note that the redirect_uri must match what as included as
the callback URL during your Custos client registration. Also note that
localhost and 127.0.0.1 are not the same; if you register 127.0.0.1 and
access your Galaxy via localhost, the redirect will not work. The client ID
and client secret are unique to your installation of Galaxy and were obtained
during client registration.
<?xml version="1.0"?>
<OIDC>
    <provider name="Custos">
        <url>https://dev.custos.usecustos.org/apiserver/identity-management/v1.0.0/</url>
        <client_id>custos-xmn3092m8tkh7546hv76-10000001</client_id>
        <client_secret>15Ur37stVGwvONALNjjq89ezRXxoKuunFzvEeTDY</client_secret>
        <redirect_uri>http://jduniversity.edu/galaxy/authnz/custos/callback</redirect_uri>
    </provider>
</OIDC>
The above configuration includes the default OIDC configuration
tags
as we as the required url tag.
URL
The url tag is a required Custos configuration. It provides a unique url
for the Custos service. The hosted public Custos service is available at the
URL included in the sample configuration above.
CA bundle
The ca_bundle tag is optional. The value for this tag is an absolute path
to a trusted CA certificate file or directory to use when verifying Custos
authorization server. If this option is used, it is also necessary to set the
value of VERIFY_SSL to True in oidc_config.xml.
Well-known OIDC config URI
The well_known_oidc_config_uri tag is optional and allows you to override the
default Custos well-known URL to point to a different instance.
Enable IdP logout
The enable_idp_logout is an optional boolean tag. If set, Galaxy will log out
the user from the IdP (eg, if a user used Google so authenticate, the user will
be logged out of Google as well as Galaxy). For this option to work, the
redirect_url during the client registration
above needs to specify a wild
card instead of the specific path (eg, https://jduniversity.edu/galaxy/*).
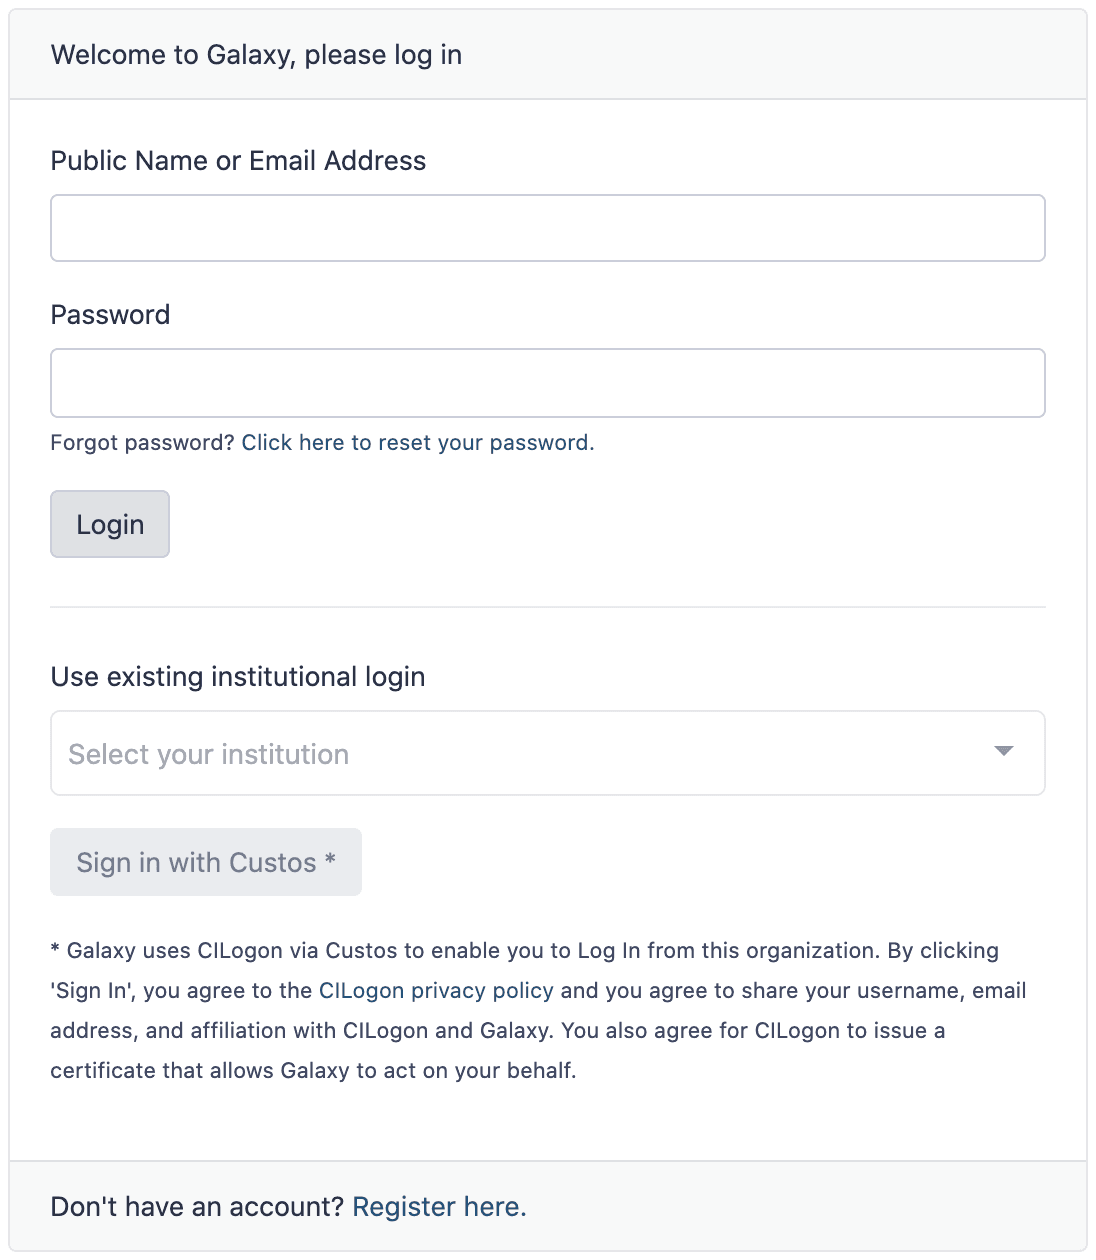
3. (re)Start Galaxy
Having set this configuration, (re)start Galaxy and the Sign in with Custos
feature will become available. The login page should look as follows:
For the end-user documentation of how to use the Custos login now that it has been configured, take a look at the end-user page.