Getting Started with Galaxy CloudMan
On this page
This is an old and currently outdated guide only kept for historical reasons. Do not use the instructions on this page. Use the new getting started guide available here: https://wiki.galaxyproject.org/CloudMan/GettingStarted
This page provides a step-by-step instructions on how to start your own instance of Galaxy on Amazon Web Services (AWS) Elastic Compute Cloud (EC2). More general information and instructions about Galaxy CloudMan can be found here.
Screencast
Here’s a screencast that walks through the process of setting up your own Galaxy cloud cluster. Note, the screencast skips one step, detailed setting up of the Inbound TCP rules. See “Inbound Rules” below.
Step 1: One Time Amazon Setup
| Step 1 Screenshots |
 1.2. Set region |
 1.3. Click on key pairs |
 1.5. Create security group |
 1.7. Add inbound rules |
-
Because AWS services implement pay-as-you-go access model for compute resources, it is necessary for every user of the service to register with Amazon. You will need a credit card to register. (You can apply for a AWS Education Grant after you register).
-
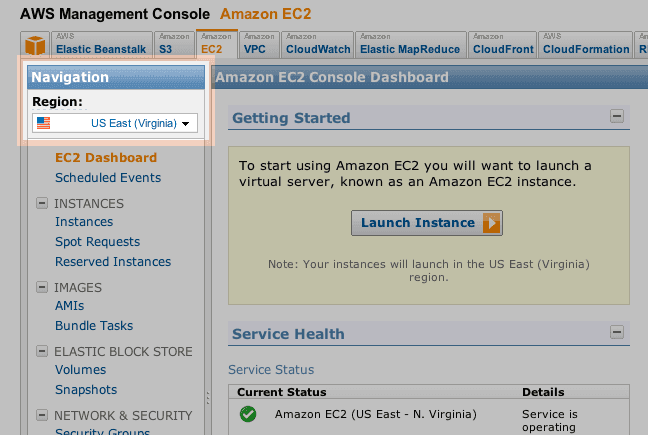
Once your account has been approved by Amazon (note that this may take up to one business day), log into the EC2 AWS Management Console and set your AWS Region to US East (Virginia). This is the only region Galaxy CloudMan is fully supported in at this time (see screenshot 1.2).
-
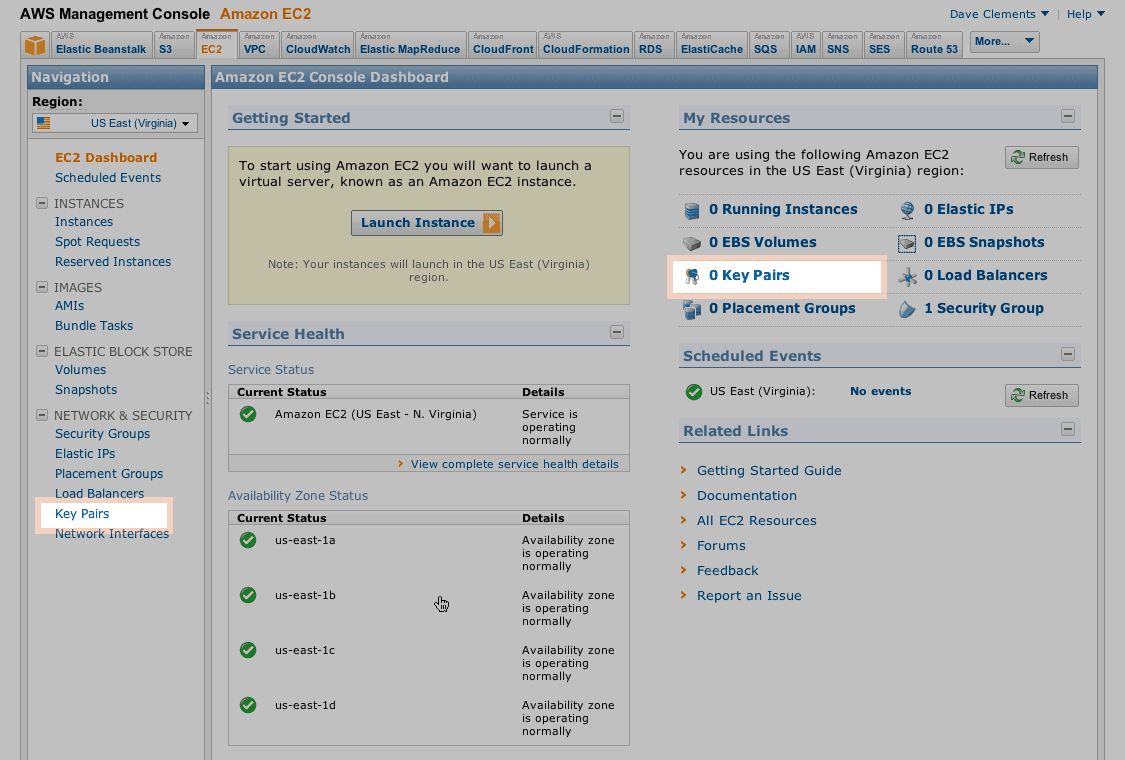
Click Network & Security → Key Pairs or My Resources → n Key Pairs (see screenshot 1.3 - if it does not look like this, then try using the Chrome browser) and then click Create Key Pair. Enter a memorable name for the key pair, e.g.,
GalaxyCloudand click Create. -
Save your private key! The previous step creates the key pair and downloads a copy to your machine with the name
MemorableName.pem. Save this file and protect it like you would your password. The key pair can be used to access started instances from the command line. -
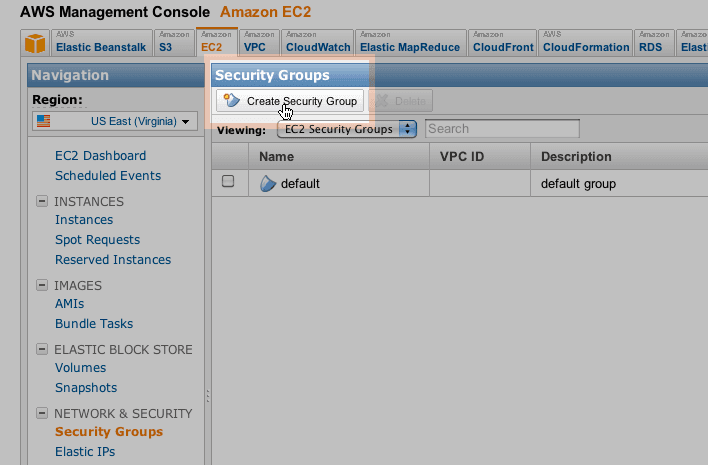
Create a Security Group by clicking Network & Security → Security Groups → Create Security Group (see screenshot 1.5). Specify a name (e.g.,
GalaxyGroup) and provide a brief description. VPC should be No VPC. Click the Yes, Create button. The new group now appears in the list and details about the group are listed at the bottom of the page. -
Add Inbound Rules to the new group by clicking the Inbound tab. For each new rule you will need to select the protocol (the rule type) from the Create a new rule: pulldown, fill in the fields for that rule, and then click Add Rule. Define these rules:
- Protocol: HTTP
Source:0.0.0.0/0Unless you want to restrict access based on the source IP - Protocol: SSH
Source:0.0.0.0/0 - Protocol: Custom TCP rule
Port range:42284
Source:0.0.0.0/0This rule opens a port on the remote instance allowing access to the cloud controller web interface. - Protocol: Custom TCP rule
Port range:20-21
Source:0.0.0.0/0This rule opens ports required for FTP file transfer. - Protocol: Custom TCP rule
Port range:30000-30100
Source:0.0.0.0/0This rule opens ports required for passive FTP file transfer. - Protocol: All TCP
Source: name of group, e.g.GalaxyGroupThe Source will automatically change to the security group ID. This action will enable multiple instances in the same security group to communicate with each other on Amazon EC2’s internal network. - Click Apply Rule Changes. The window should look like the screenshot 1.7.
- Protocol: HTTP
All of these inbound rules are necessary for proper functioning of CloudMan and Galaxy.
Step 2: Starting a Master Instance
| Step 2 Screenshots |
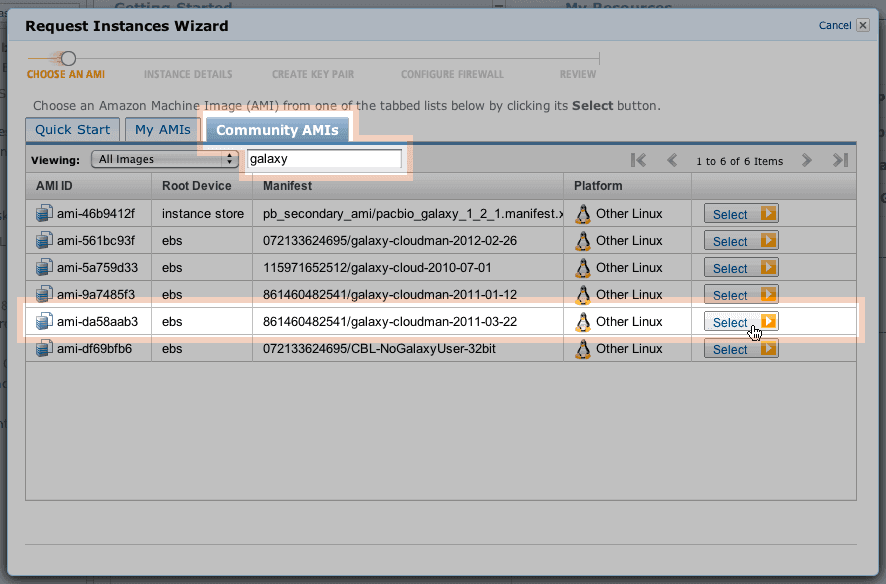 2.3. Find & Select AMI |
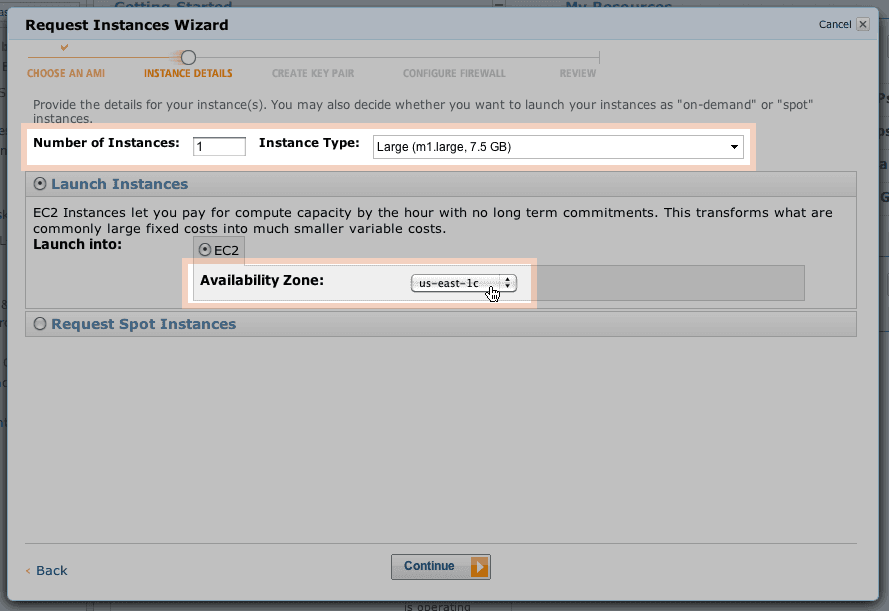 2.4. Instance details |
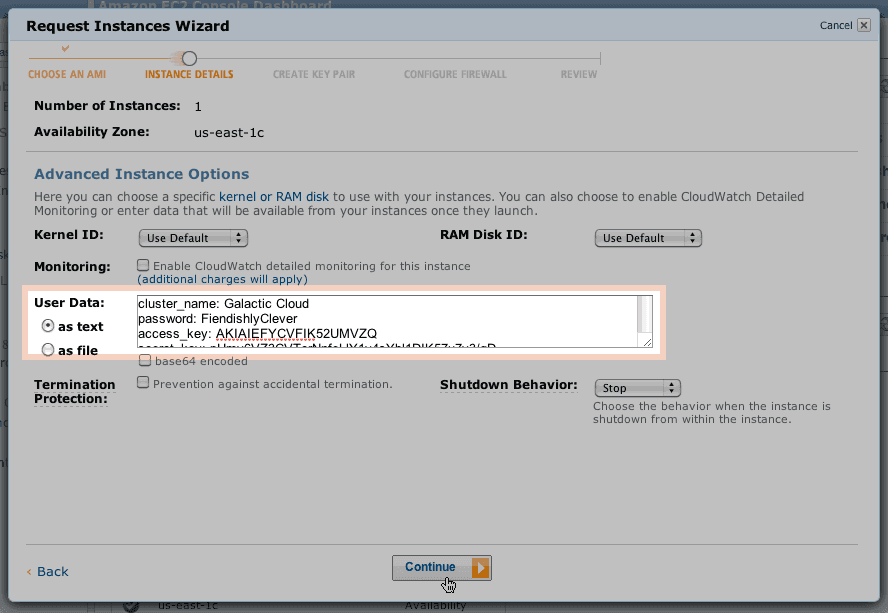 2.5. Set User Data. |
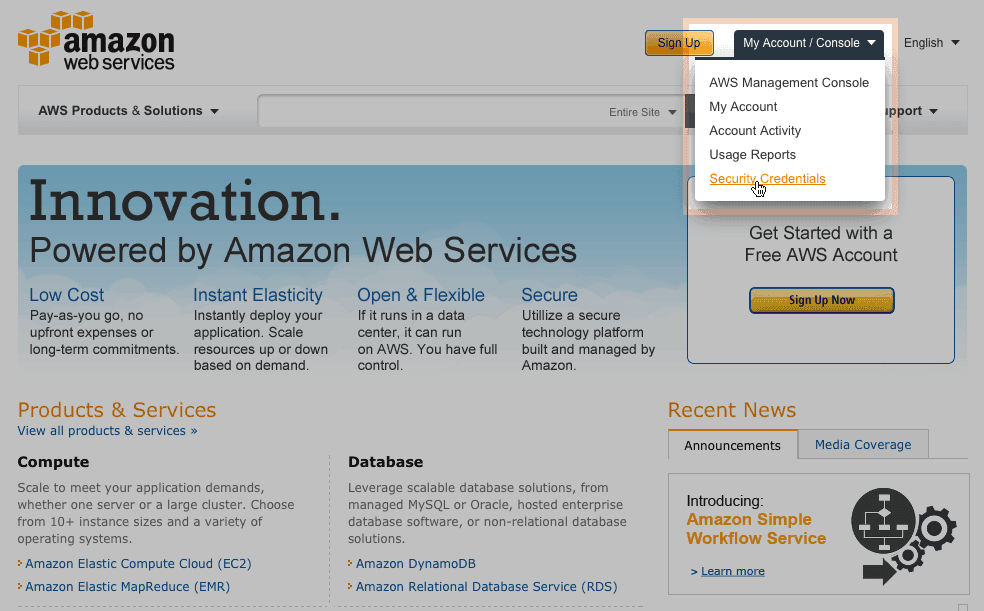 2.5.3. Get to credentials. |
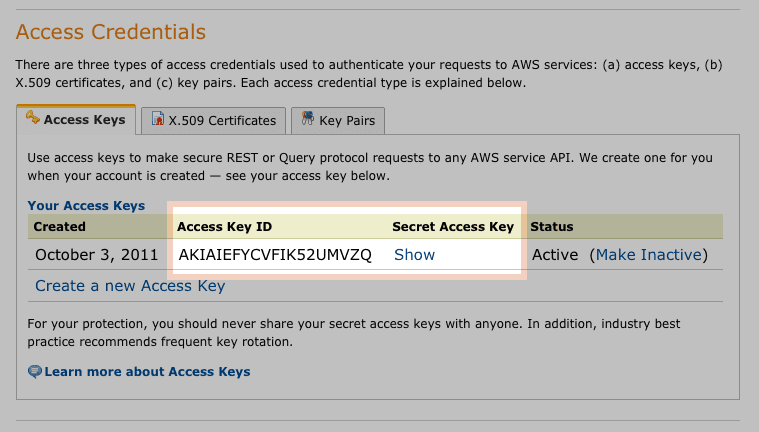 2.5.4. Credentials. |
 2.9. Review & Launch! |
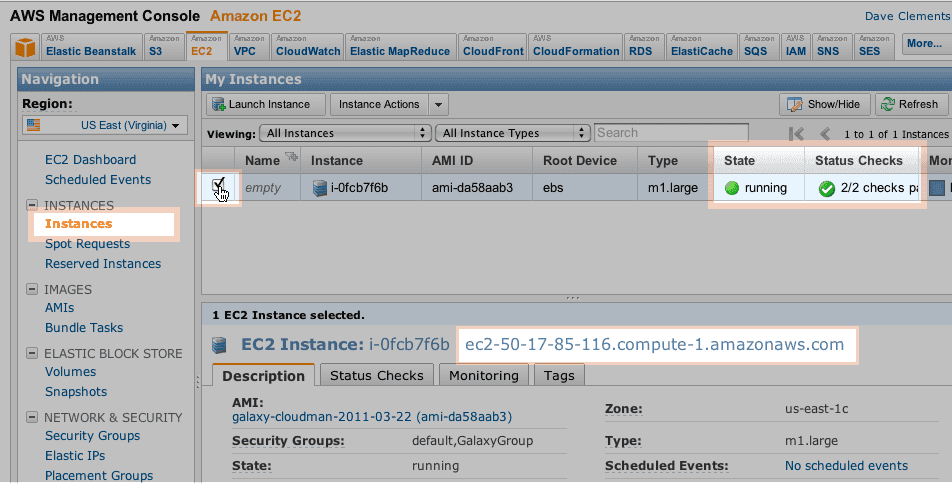 2.10. AWS instance is up |
 2.11. Galaxy CloudMan is ready to configure |
** This step is required every time a new cloud instance of Galaxy is desired.**
CloudMan works in a master-worker fashion: the master is used to control all of the needed services as well as worker instances. Worker instances are needed to run analysis jobs submitted through Galaxy that runs on the master instance (for a more detailed description of running Galaxy in cluster environments, see the cluster performance page). So, in order to start a Galaxy CloudMan cluster, we need to start a master instance.
-
Go to the AWS Management Console for EC2 and click Launch Instance
-
Select the Classic Wizard in the popup window.