Workflows as Custom Tools
On this page
Promote a Workflow in the Tool Panel
All workflows are listed by default in the left tool panel in the Analyze Data view. But, if you use a workflow frequently, it can be helpful to have it listed at the top. See the tutorial below for step-by-step details. Or, do the following:
- Go the the Worflow home page by clicking on the Workflows link in the upper masthead.
- On the bottom of that page, in the section ‘Other options’, click on the button ‘Configure your workflow menu’.
- The next page lists all of your workflows. To place any at the top of your workflow list, mark the checkbox in the column Show in menu, scroll to the end of the page, and click on “Save”!
Hiding Intermediate Steps
Customizing a workflow so that only one or some of the jobs included are active in the History panel can be a useful way to reduce clutter. This can also make a complex workflow act more like a tool.
Hide intermediate workflow steps using the workflow editor.
Tutorial: Promote a Workflow with Hidden Steps
Step-by-step instructions for promoting a workflow and hiding intermediate steps.
Where are Workflows in the Tool Panel?
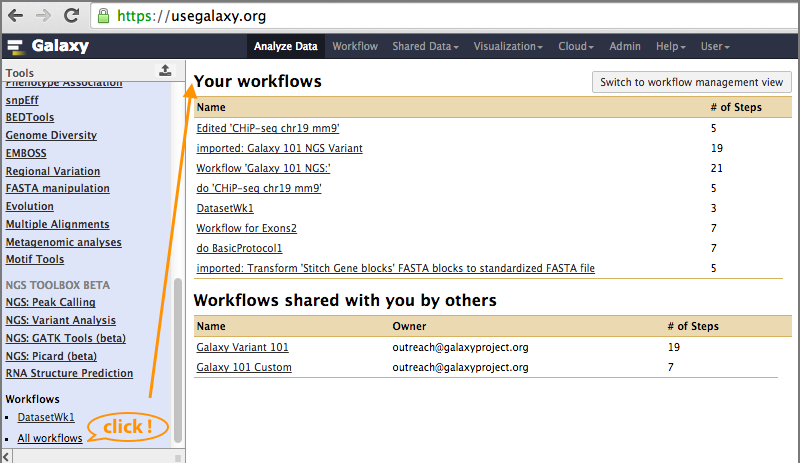
Access Galaxy and click on Analyze Data in the top masthead to reach the Analysis Home View. The Tool Panel is on the far left. Your workflows are at the bottom of the list of tools (scroll down if needed).
Clicking on All workflows will display workflows owned by you or shared with you in the center panel.
If you see workflows listed above All workflows, these have been promoted for quick access. Do not see any or want to add more? That is what this tutorial will explain how to do.
*workflows in the **tool panel***
Go to the Workflow Management View
To edit a workflow or to manage where it is displayed, go the management view by clicking on Workflows in the top masthead from any page or by using the button at the right top of the All workflows list view.

*going to workflow **management***
Navigating the Workflow Management View
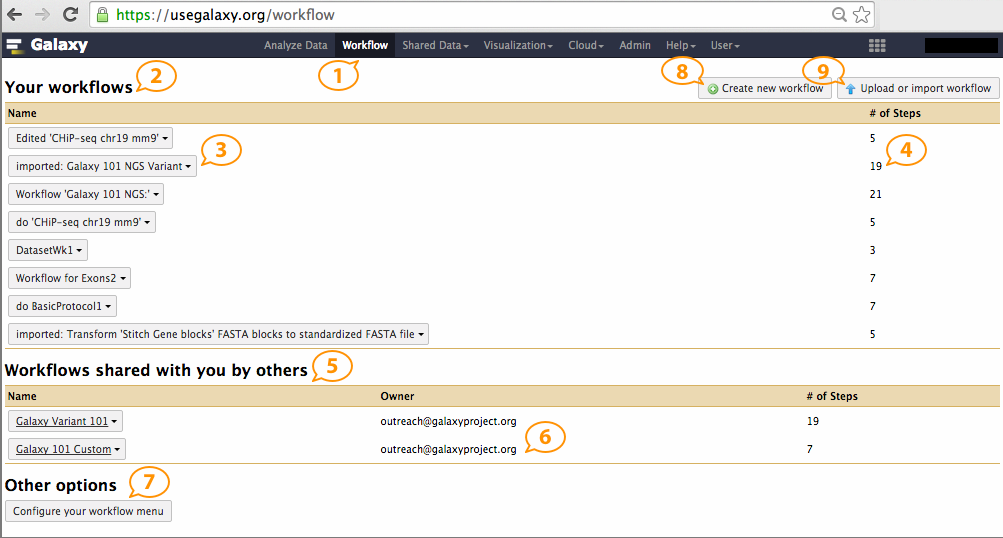
- The Workflows link is in the top masthead.
- Your workflows lists all workflows owned by you.
- Each workflow has a menu of options. Access the menu by clicking on it.
- The number of steps in each workflow is summarized in this view.
- Workflows shared with you by others lists workflows that you do not own, but have been granted access to. These also have a menu. You can run a workflow without owning it, but to edit you must make a copy first.
- Who shared any particular workflow with you is listed in this view.
- Other options contains additional workflow functions. Configure your workflow menu is the function this tutorial will focus on.
- The Create new workflow function will launch a new blank canvas in the Workflow Editor.
- The Upload or import workflow function will load a workflow saved to a file or import a workflow through a link from another Galaxy server.
*workflow **management view ***
Configure Your Workflow Menu
Starting on the Workflow Management View page, scroll to the bottom and click on the button for this function to access the view where modifications are made. (see 6 in the graphic above)
Promote Your Workflow
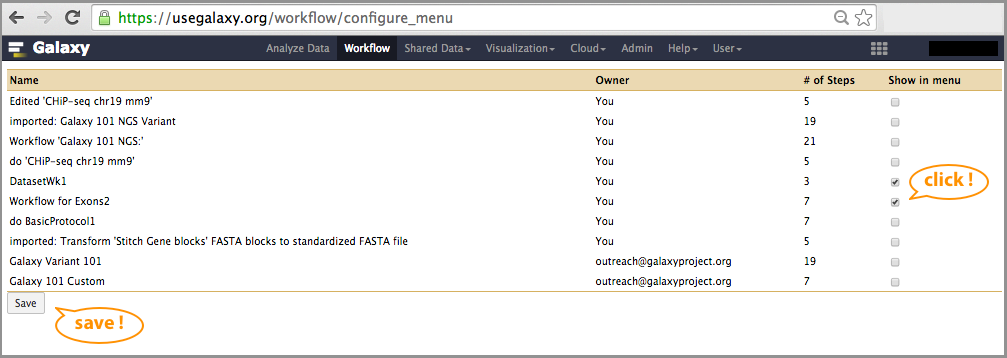
The Configure Workflow Menu view lists each of the workflows owned by you or shared with you. The owner and number of steps are listed. Click on a checkbox under the Show in Menu column to promote a workflow it is displayed directly in the Tool Panel, just like a tool.
*workflow **configure tool menu***
Be sure to save any changes using the button at the bottom of the page.
Return to the Analysis Home View
Once finished, a green bar indicating that the workflow was successfully added to the menu will appear at the top of the page when it is refreshed. Wait until this occurs to ensure that your changes are active.
Click on Analyze Data to return to the Analysis Home View where the updated tool panel can be reviewed and the newly promoted workflow can be accessed directly.

**analysis home view**
View and Run Promoted Workflows
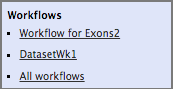
Review the updated Workflow section in the Tool Panel to confirm the promotion.
*updated tool panel **workflow section***
Then launch the workflow by clicking on the name.

***run a workflow** from **tool panel***
Editing to Hide Intermediate Steps
Too many steps displayed by default in the history after running a workflow “tool”? Consider hiding the intermediate steps. How many to display/hide depends on what is important to access or visualize in the history as an active dataset. Often just the last step is wanted as a result.
Start by entering the Workflow Editor for the target workflow, then follow these instructions: Basic Editing, Hidden Datasets
Not sure how to access or use the editor? That same wiki has all the help you need to get started.
Reminder About Sharing Workflows
Workflows can be shared just like other Galaxy objects. Read more about Sharing